How to lay large-size ceramic slabs

March 15, 2021

How to lay large-size ceramic slabs

Large size slabs

Large size refers to square or rectangular slabs where one or both of the dimensions is greater than 60 cm.

Kontinua is the name of Casalgrande Padana’s large and thin porcelain stoneware slabs, the latest product in a constantly evolving range designed to expand the possible uses and broad scope of the brand's products.

Beginning with a selection of products from the Cemento, Marmoker, Marmosmart, Onici, Pietre di Paragone and Pietre di Sardegna collections, Kontinua is extending the range with the 160x320 cm, 120x260 cm, 120x240 cm, 120x120 cm and 60x120 cm, 90x18 cm and 90x270 cm sizes, which can be integrated with the traditional-thickness products to help meet the new demands of contemporary design.

Steps for laying large-size ceramic slabs on the floor

Before laying, ensure the support is clean and meets all the quality criteria for installation. Any defects must be corrected prior to laying. The adhesive must be chosen based on the type of support, the intended use and the conditions it is to be used in.

The essential requisite for correct installation is the bonding bed: the layer of adhesive between the rear of the slab and the laying support must be as continuous and compact as possible, without empty spaces. This can be achieved by using the double spreading technique, followed by tapping by hand and mechanical vibration. The glue must be spread both on the support and on rear of the slab, removing any dust and packaging residue beforehand. To spread the adhesive, use differently shaped toothed trowels for the support and for the rear of the slab. Spread the adhesive on the support using a trowel with 10 mm slanted teeth in one direction only (parallel to the short side for rectangular slabs).

To correctly lay large-size ceramic slabs:

• Spread the adhesive on the installation surface using a 10 mm-toothed trowel, working in one direction only (parallel to short side for rectangular slabs).

• Spread the adhesive on the rear of the slab using a 3 mm-toothed trowel, working in matching direction.

• Carefully move the slab into position, placing adhesive against the support surface.

• Move the slab delicately, making small movements in all four surface directions.

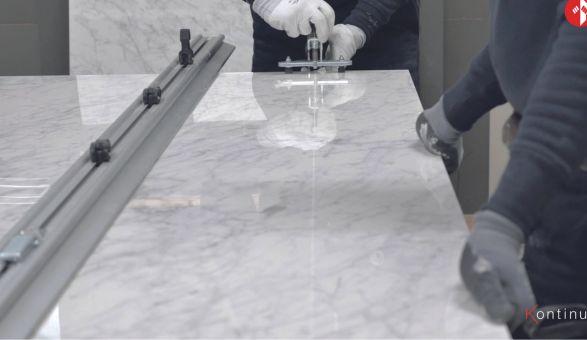
• To achieve the correct positioning, use slab-handling tools that permit precise movements.

• Vibrate using an anti-bouncing tile beater or motorised tile vibrator, from the centre of the slab to the sides, continuously and uniformly over the entire surface.

• Wait for the adhesive to set according to the manufacturer’s instructions before walking on tiled surfaces. Avoid accidental loading of the surface.

• Protect joints prior to grouting: prevent accumulation of dust and dirt in open joints.

Technical joints

Open-joint laying is used in settings subject to high levels of mechanical and hygrothermal stress, because it reduces the modulus of elasticity of the tiled surface, and thus the risk of the finished flooring rising, coming away or cracking.

Technical joints are inserted in the tile edges in order to gain better support against mechanical and hygrothermic stresses:

- perimeter joints, around the edges of the area to be tiled and against intervening structural elements.

- subdivision joints, inserted through the thickness of the slab + adhesive + 1/3 of screed.

- expansion joints, inserted only through slab + adhesive.

Sizing subdivision joints area:

• 24 - 25 m2 for interior installations

• 9 - 10 m2 for exterior installations

• length/width ratio: < 1.5 joint width: on the basis of mechanical and hygrothermic stresses of the tiling installation and elastic capacities of the joint materials.

Tips for wall installation

• If installing wall cladding using (Cp-Kerclip) visible safety systems, anchor the clips to the support prior to spreading the adhesive (using anchors, nailgun, etc.).

• If installing wall cladding using (Cp-Kerfix) invisible safety systems, cut the back of the slab prior to spreading the adhesive. If the slab cuts are carried out at the worksite, the distance between cuts must be > 40 cm. The CP-Kerfix system is recommended for slabs with a thickness of 10 mm or more.

• Carefully move the slab into position, placing the adhesive layer against the support surface.

• Anchor the Cp-Kerfix clips to the support surface. • Wait for adhesive to set according to the manufacturer’s instructions before carrying out any cladding operations (holes, cuts, etc.), and before applying any loads to the tiling.

LAYING FLOORING WITH LARGE-SIZE CERAMIC SLABS

LAYING COVERINGS WITH LARGE-SIZE CERAMIC SLABS

Rimani aggiornato sul mondo dell’architettura e del design
Flag of Germany